Sunday, December 28

Water color effect

This tutorial is about creating a very easy and fast way to achieve water color effect to the photos. It wont take more than 3 minutes to do it.

To create watercolor painting effect we need a bright image.


1. Open the image.


We need three copy of this image layer. So press Ctrl+J three times. Now hide the first 2 layers lets work on 'Layer 1'. Go to Filter->Artistic->Cutout and apply following settings:


2.Now change the Blending mode to Luminosity.


3. Now unhide the second layer(Layer 1 copy). Make sure the layer is selected and go to Filter->Artistic->Dry brush and apply following settings:


4. Change the blending mode to Screen.

5. Now unhide the second layer(Layer 1 copy2). Make sure the layer is selected and go to
Filter->Noise->Median and change the radius to 12 pixels. Also change the blending mode to Soft Light.


Final result:


Wednesday, December 24

Realistic Grass texture

1. Create a new document. Fill in the background with grass green color.>I used the color. Goto Filter->Add noise->Noise and apply following settings


2.Blur the layer with Gaussian layer. Filter->Blur->Gaussian blur. Set the radius to 1 pixel.

3. Goto Filter->Stylize->Wind Change the settings to Method:Stagger and Direction:From the right.

4.Now select Image->Rotate canvas->90CW. Again apply the wind effect(Filter->Stylize->Wind). Change the settings to Method:Stagger and Direction:From the left.

5. Flip the image by selecting Image->Rotate canvas->90CCW. Adjust the contrast of the image by Image->Adjustments->Levels


Final result is


Tuesday, December 23

Web 2.0 text effect

1.Create a new document with white background. Enter some text with any font and size. Double click the layer in layers window or go to Layer->Layer style->Blending options to open the blending options window.

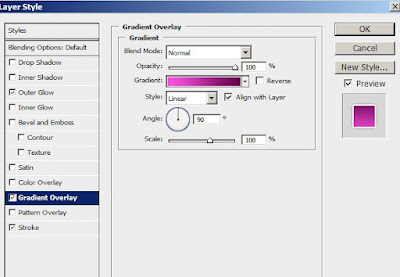
2.Apply the Gradient overlay effect. Make sure the lightest color is the lower part of the text to have an enhanced effect.


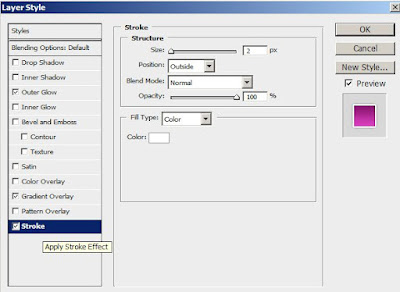
Apply the stroke effect.


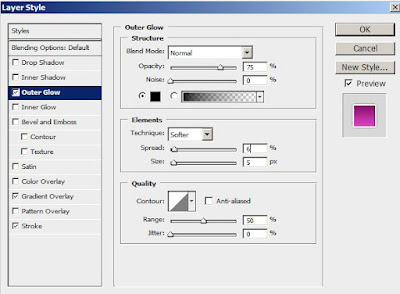
Next give an outer glow to the text


So the text will look similar to:


3.In the layer window, while holding down the ctrl key click the text layer. We can see a selection made to the outline of text.


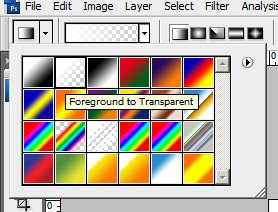
4.Create a new layer(Ctrl+Shift+N). Change the fore ground color to White. Select gradient tool. Choose the second gradient effect-Foreground to Transparent.


5.Holding down down the shift key drag your mouse from top of the selection to half way thru text.


6.Reduce the opacity of Gradient layer. Now select the bottom half of the text using rectangular marquee tool.


Then press delete.

Here is the final result

Sunday, December 21

Glass texture

1. Create a new layer of any size.
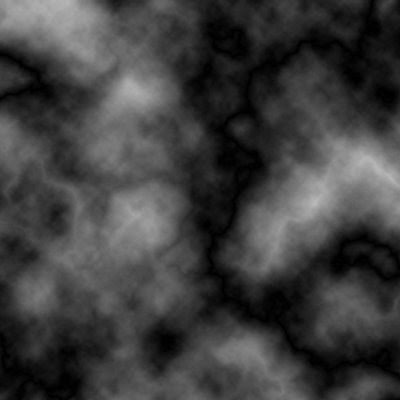
Set the foreground color to Black and backgound to white. Go to Filter->Render->Clouds. Then Apply Filter->Render->Difference clouds two or three times.


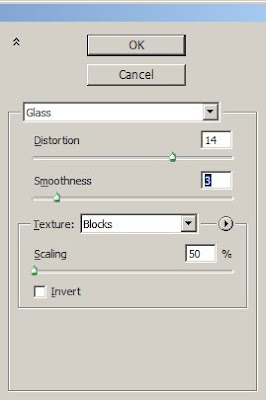
2.Select Filter->Distort->Glass and apply following settings:


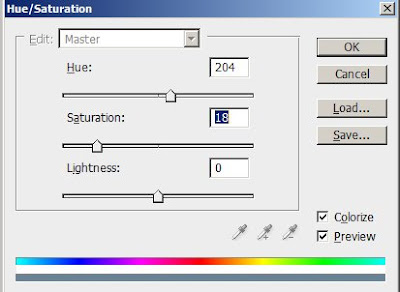
3.Press Ctrl+U to apply following effects:


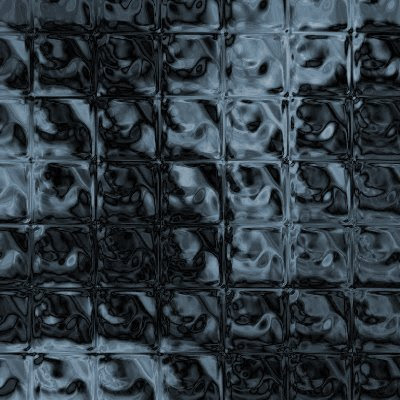
Final Result: