This tutorial is about to make realistic Ipod shuffle player. Lets do it!
1. Download an apple Ipod shuffle image. The image of ipod shuffle should be at least 400pixels wide.
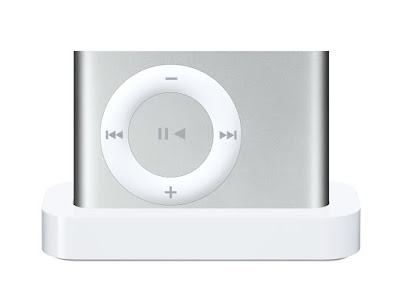
Open that image and start making guides.
(To make guides rulers should be visible. Press Ctrl+R to show the ruler. To make guides drag from the horizontal ruler to create a horizontal guide OR drag from the vertical ruler to create a vertical guide. You can also move and delete guides.)
Create guides for the edges of Ipod shuffle and the borders of click wheel.
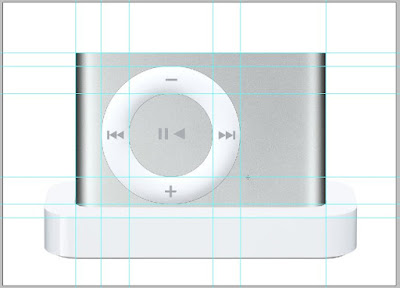
Why we are doing this is that to make sure that the click wheel of ipod is in the proper alignment.
2. Hide the sample image after making guides(you can show and hide guides anytime using Ctrl+;).
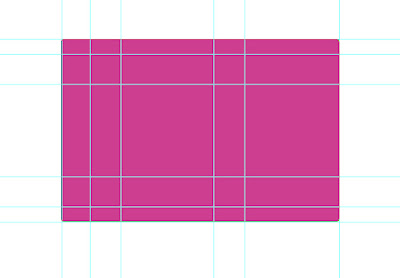
Select the rounded rectangle tool with 5pixel radius and make sure that shape layers are selected in the options palette.

Make sure that View->Snap to->Guides are selected and draw the rectangle(Color:#cd3e90) proportion to the guides we made for the edge of the player.
3. The Ipod shuffle is not perfect rectangle so we have to change the shape of corners. Select Direct selection tool and change the anchor points of the corners(A).
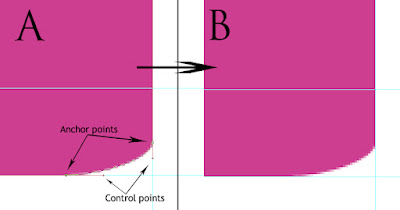
Make changes to both anchor points and control points. Press enter to get the results(B).
Repeat for all the corners(Make sure to press enter after changing the points of each corner).

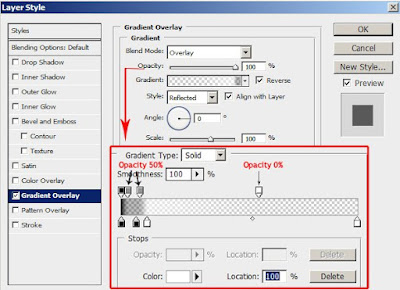
4. Now we have to create Shadows and highlights. It can be achieved easily by using layer style. Double click the rectangle layer to open the layer style window to apply gradient overlay. And apply following settings:
5. Now we have to make click wheel. Select the Ellipse tool with white color and make the circle shape proportion with the guides made for click wheel.
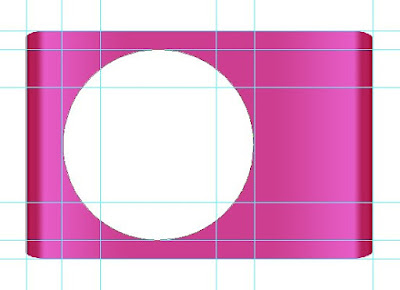
Then with the ellipse tool selected choose Exclude overlapping shape areas from the options palette.

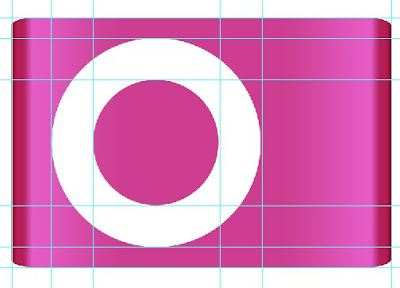
Draw the inner circle proportionate to the guides.
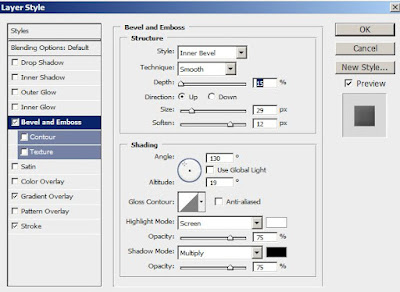
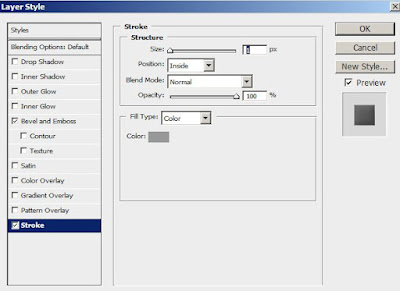
6. To make the click wheel more realistic we are going to add some layer style to it. Double click the circle shape layer to open the layer style window and apply following settings:
7. Lets add some buttons. Use rectangle tool to make these shapes(Color#c0c4c7):
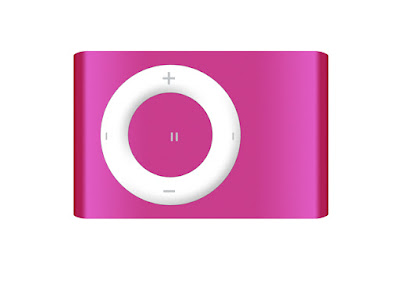
Use the polygon tool with 3 sides(see options palette of polygon tool) to create remaining buttons.
 8. The ipod shuffle surface is not smooth, its a bit grainy. Duplicate the rectangle tool and change the color to black. Right click and select rasterize layer, then go to Filter->Noise->Add noise and apply following settings:
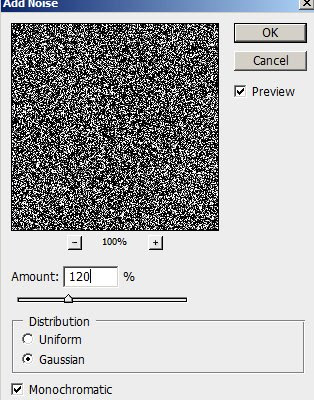
Change the opacity to 2% and the blending mode to multiply.
So the final outcome is:

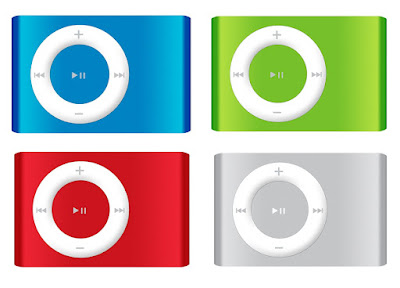
You can try in various colors:
1. Download an apple Ipod shuffle image. The image of ipod shuffle should be at least 400pixels wide.

Open that image and start making guides.
(To make guides rulers should be visible. Press Ctrl+R to show the ruler. To make guides drag from the horizontal ruler to create a horizontal guide OR drag from the vertical ruler to create a vertical guide. You can also move and delete guides.)
Create guides for the edges of Ipod shuffle and the borders of click wheel.

Why we are doing this is that to make sure that the click wheel of ipod is in the proper alignment.
2. Hide the sample image after making guides(you can show and hide guides anytime using Ctrl+;).
Select the rounded rectangle tool with 5pixel radius and make sure that shape layers are selected in the options palette.

Make sure that View->Snap to->Guides are selected and draw the rectangle(Color:#cd3e90) proportion to the guides we made for the edge of the player.

3. The Ipod shuffle is not perfect rectangle so we have to change the shape of corners. Select Direct selection tool and change the anchor points of the corners(A).

Make changes to both anchor points and control points. Press enter to get the results(B).
Repeat for all the corners(Make sure to press enter after changing the points of each corner).

4. Now we have to create Shadows and highlights. It can be achieved easily by using layer style. Double click the rectangle layer to open the layer style window to apply gradient overlay. And apply following settings:

5. Now we have to make click wheel. Select the Ellipse tool with white color and make the circle shape proportion with the guides made for click wheel.

Then with the ellipse tool selected choose Exclude overlapping shape areas from the options palette.

Draw the inner circle proportionate to the guides.

6. To make the click wheel more realistic we are going to add some layer style to it. Double click the circle shape layer to open the layer style window and apply following settings:


7. Lets add some buttons. Use rectangle tool to make these shapes(Color#c0c4c7):

Use the polygon tool with 3 sides(see options palette of polygon tool) to create remaining buttons.
 8. The ipod shuffle surface is not smooth, its a bit grainy. Duplicate the rectangle tool and change the color to black. Right click and select rasterize layer, then go to Filter->Noise->Add noise and apply following settings:
Change the opacity to 2% and the blending mode to multiply.
So the final outcome is:

You can try in various colors:

2 comments:
Added to www.psaddict.com
The precision that is added top the designing...hard to get it wrong...lovely work done here.
Xbox 360 accessories
Post a Comment